


I already showed you a diaper cake I made for Sandy's baby shower with a really lengthy tutorial without many pictures. Last week my old manager asked if I could help her make a diaper cake for my other old manager. And of course I agreed J
 So here is another tutorial, that’s hopefully easier to follow with more pictures. Keep in mind no two diaper cakes are the same.
 So here is another tutorial, that’s hopefully easier to follow with more pictures. Keep in mind no two diaper cakes are the same.
Basic Materials:
♥ 1 box (96 ct) newborn or size 1 diapers
♥ 1 wrapping paper roll or 2 paper towel rolls
♥ Baby girl hair ties or rubber bands
♥ String
♥ 2 spools of ribbon (1 large and 1 medium width)
♥ 1 cake stand/base
Optional Adornments/Gifts:
♥ 1 hooded towel
♥ Numerous packages of burp cloths
♥ Numerous packages of wash cloths
♥ Numerous packages of onesies
♥ 1 hat and socks set
♥ 2 flower lollipops
♥ 3 little jingly animals
Total Cost: ~$100
Total Time: 3 hours
Instructions:
1. Roll each diaper and secure with hair tie/rubber bands. In the same manner, roll some wash cloths, burp cloths and onesies, trying to make them similar heights.

2. Stand a bunch of diapers up and start gathering until they form a circle. Tie loosely with a string. Add more until you get desired shape and size. Make this your base (1).
3. Cut wrapping paper roll in half. Remove two diapers from your base (1) where you want your support (wrapping paper roll) to go. Keep in mind that the support should go through the next two tiers (2&3), so place them towards the inside of the base (1).

4. Repeat step 2 around your wrapping paper rolls making tier (2) smaller than the base.

5. Fold towel lengthwise to be the same height as base (1). Wrap around base tucking the top over a row of diapers. Neatly fold excess towel underneath base so it lays flat. Our towel wasn’t long enough and used the matching wash cloth to cover the gap. Secure with pins. Make sure you tell Mom that there are pins in her cake!

6. To cover the outside of tier (2), repeat step 5 with burp cloths. We also covered the top of this tier by sticking washcloths on top and tucking it in.

7. Repeat step 4 with wash cloths, burp cloths and onesies to make tier (3). Cut wrapping paper rolls so they do not extend above this tier (3). Remove a diaper from the center of this tier (3) and replace with wrapping paper roll. Repeat step 4 to make tier (4).

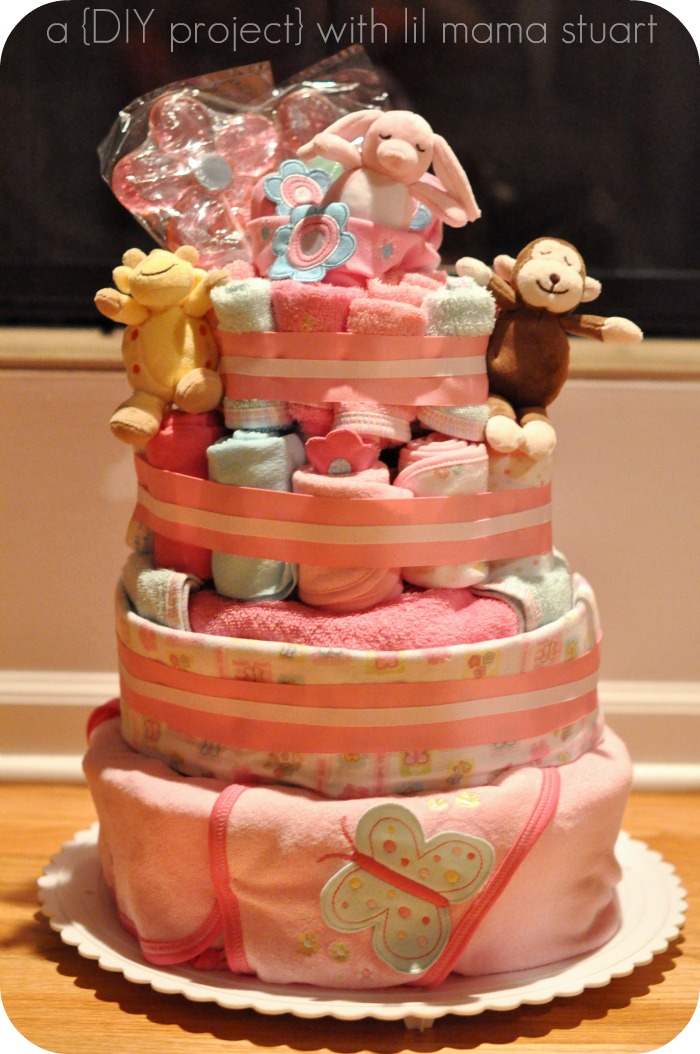
8. For our topper, I put a diaper in each sock. Then they were able to stand inside the (upside down) hat. I removed a few wash cloths/burp cloths/onesies from the center of our top tier (4) to make room for the hat and stuffed it in.
9. Tie wide ribbon around each layer of the cake. Secure with a pin. Tie narrower ribbon in the center of each wide ribbon. Secure with a pin.
10. We stuck the lollipops in the top and secured the little animals with a pin. They’re saying taa-daa! J


I hope this tutorial was easier to follow than my first one! What do you think?

linked up at:


2 comments:
Yay! I will be using this for an upcoming baby shower in Oct. Hopefully it turns out as beautiful as yours. ;)
hi, first time visitor here! this is a gorgeous diaper cake! i've actually never seen one with burp cloths, etc. included- clever! thanks for posting!
nice meeting you.
cheers,
rachel
http://www.upperbottom.com
Post a Comment