




Photobucket Photobucket Photobucket Photobucket Photobucket Photobucket
Showing posts with label holidays. Show all posts

Thursday, January 3, 2013

Holiday Party Recipes

I love all the gatherings this time of year with good food, friends and family. After ringing in the New Year, the holiday parties are coming to an end, but I wanted to share what recipes I've been using lately to feed a crowd.

Appetizers -
Sugared Cranberries, Chutney and Brie - the sugared cranberries remind me of glistening snow, sooo prettty! I had WAY too many leftover cranberries though.  Next time I would only use half a bag of fresh cranberries. I picked up a jar of cranberry chutney at a Honey Baked Ham store.  This recipe makes the typical pre-party snack of cheese and crackers way more interesting and is so delicious!


Sausage Stuffed Mushrooms - there are never any leftovers when I bring these babies to our Secret Santa exchange.

Mini Pepperoni Puffs {or cupcakes as my friend called them}- with basic ingredients and minimal steps (grease pan, mix, pour in pan, bake), this recipe is easy to whip up before you have to head out. Instead of fresh herbs at the end, I added dried herbs to the mixture before baking. I wish I doubled this recipe!


Salad - To accompany our Christmas ham dinner, we started with Pioneer Woman's Apple, Pecan and Blue Cheese Salad with Dried Cherries. People seem to either love or hate blue cheese. I am definitely a fan.


What holiday season is complete without cookies? I made these soft and chewy chocolate chip cookies

To add a little taste of the holidays, I added one package of chopped up Andes mints. Yummy yummy in my tummy! Unwrapping chocolates is an easy, safe, keep them quietly busy for a long time task for eager toddlers.

We also left a few cookies out for Santa...I He gobbled them up, drank his milk and left a note and some donuts for breakfast!

Later that week, Agatha hosted a small dinner where Sweet Vermouth Chicken was the shining star. The sauce, mushrooms, cranberries, nuts and pearl onions were a delicious compliment to normally boring chicken breasts. I made  Pioneer Woman's Creamy Mashed Potatoes to go along with the other sides of carrots and Brussels sprouts.

Source: myrecipes.com via Mindy on Pinterest


And for football Sunday, I made French Dip Roast Beef Sandwiches to fill big bellies before the end of the Bears underwhelming season. Definitely add two sliced jalapenos to the crock pot for au jous with a kick.

What are your go-to recipes for holiday parties??

Thursday, December 13, 2012

How to Make DIY Reindeer Antlers

One day Mia said, "Mom, can you sew me reindeer antlers? And for my friends at school too." This girl asks and she shall receive! Here's a tutorial on how to make your own cheap DIY reindeer antlers. Ok it's basically the same as my Mickey Mouse ears tutorial, but still.

Time: 5 minutes
Cost: $1
Materials: Headband, fabric glue, 1 sheet brown stiffened felt
Instructions:
1. Fold felt in half. Using a white pencil or crayon, draw outline of antlers with a tab at the bottom (to fold over the headband).

2. With the felt folded in half, cut antlers out. You should have 2 antlers.
3. Check placement on headband, fold tab on dotted line back around headband and glue down. Hold or use a binder clip to hold in place for a few minutes to let the glue set.
Ta-da! My little Rudolph is ready for her holiday show at school tomorrow! She's been practicing and we love love love her little voice. She also wants to wear these PJs every night! I'd post a same time last year comparison, but it doesn't look like she's changed!
 

Tuesday, December 11, 2012

How to Change the Shape of Bokeh

Did you all get your trees up this weekend? I showed you Mia's little pink tree the other day. And here it is all lit up, even with star shaped bokeh!  Without this little trick, the lights on the right would normally come out as circles.

Want to know how to change the shape of your bokeh/out of focus lights?

If you recall last year, my photog friends and I played around with black cardstock, white lights, and willing {for a few minutes at least} children.
So fun, right!? Now that your lights are up, start playing! Get more details on how to change the shape of bokeh here.

Thursday, December 6, 2012

Countdown to Christmas Activity-Santa's Beard

So it's a few days late to start a countdown to Christmas, but it'd be perfectly fine to catch up on this one.  Rather than an Advent calendar stocked with sweets or an activity (that I'd have to think of and fit in) everyday, I came across this free DIY countdown to Christmas printable. Gluing a cotton ball to Santa's beard every day is simple enough for my almost 3 year old.
Get the free download here from Inviting Printables.

I'm a traditional red and green kinda girl around this time of year, so I printed out the file, cut out Santa's hat, face and 'stache and glued it onto green cardstock. Mia helped me write each of the numbers and I rewrote the little poem for her. Although looking at my handwriting is totally bugging me, I'll try to look past it. Santa hangs at the bottom of our decorated fireplace, right at Mia's level. How do you countdown to Christmas?
 

Wednesday, December 5, 2012

DIY Family Tree Art Project and a little Christmas tree

With the holidays upon us, this month at school Mia was assigned to make a family tree. No instructions were given so as not to limit creativity. And of course you know me - I love a creative art project!

Time: 1 hour (with help from a toddler)
Cost: $2 for pictures printed at Walgreens - Rather than finding individual pictures of each person like a traditional family tree, I thought it'd be simpler and show the groupings better with pictures of each family as a whole.
Materials: cardstock, pictures, ribbon, sticks, twine, container, styrofoam/soil/rocks, glue/tape

Mia and I went to the park and collected sticks to use for her {literal} family tree. While Doug and Mia traced circles and cut out the pictures and cardstock backing, I attached the sticks to one another by wrapping twine around them. After Mia glued the pictures to the cardstock, she punched holes in each picture and cut ribbon for me to tie on each one. I put styrofoam in the base and topped it with rocks to keep the tree sturdy in its container. And ta-da! Our little family tree is ready to be displayed, even after the class project is over.

And on to other trees...during dinner one night in early November, Mia said "Mom, I wish I could have a pink princess Christmas tree." This caught me off guard since we hadn't been talking about Christmas yet. After Thanksgiving, I snagged this pink pre-lit tabletop tree at Kohl's for $10 and silver ornaments for $5. The ornaments didn't come with hooks, so I used paperclips. You can't even tell, right?!

Complete with fluffy tree skirt {fabric I often use in my newborn sessions}, I think we have a happy little camper. It looks purple during the day, but when lit up at night, it's pink!
Here's my exif (camera settings) so you too can take pictures of your pretty tree at night: 
ISO 200 | f/5.6 | 1.6 ss | 50mm {on a tripod} 

Wednesday, November 28, 2012

Thanksgiving 2012 Recap

**Don't forget to enter my giveaway to win customized art for a child's room!**

Coordinating family schedules with siblings, siblings' spouses, and siblings' spouses' families is always a challenge. We managed to fit it all in this year by...

Hosting Thanksgiving lunch Thursday afternoon. I wasn't sure if I could do it, but I successfully got everything on the table by 1pm. Good ol' grocery store flowers rearranged...{wire basket from Target's $1 spot}

Mia liked helping with everything from throwing ingredients into the brining bag...

 ...to mixing the herb butter...Turkey Tom was 13 pounds this year and we're still working on leftovers...

...washing cranberries, mashing potatoes, licking the masher clean, and whisking ingredients for dessert...

Oh yes these curlers are from my tight, bouncy, heavily hairsprayed ponytail cheerleading competition days....

Love her hair curled, even if it doesn't last very long.

On my menu {click links for recipes}, we had:
Turkey - not a fan of the gravy though. I'll try a different recipe next year.
Cranberry Sauce - Its definitely chunky with the minimal liquid in this recipe. My mom preferred it thinned out.
Apple, Pecan, and Blue Cheese Salad with Dried Cherries - definitely making this PW salad again.
Red Lobster Cheddar Biscuits - a little too dry. Maybe I'll try again but mix it less to keep it lighter.
Roasted Vegetables- I also throw in green beans, zuchini and squash and use regular mushrooms and onions. Definitely cut the oil down from his recipe.
Creamy Mashed Potatoes - a stick of butter and a stick of cream cheese. What's not to love??
Corn
Blackberry Cobbler - this was so SO easy, light and delicious! I'm usually skeptical of recipes with just a few ingredients (only 5!) and minimal steps, but this was very good, especially for those who don't care for rich sweets.  Definitely saving this recipe!
Click here for my 2010 Thanksgiving recap. With my terrible memory, these recaps help me plan next year's menu!

But the feasting was just getting started. Friday we had Lou Malnati's for Halmani's birthday with a cake from Sweet Mandy B's. Their cake/icing is very rich, too much for Umma. Same time {two years ago} comparison!

Saturday we brought Grandma her last requests before she leaves for Thailand. Randomly paired, but still delicious - Great Seas chicken wings and Art of Pizza (yes, more stuffed pizza). We'll miss you sooo much Grandma!

Then to top it all off, I saw Breaking Dawn with my girlfriends and ended the weekend at RPM Italian to celebrate a 30th birthday. A lot of people mention the small portions at this trendy new spot, but I thought the pasta dishes were sized just right, especially with having appetizers and dessert. The buffalo mozzarella in the lobster caprese was soo nice and creamy. I wasn't a fan of the lemon in the fritto misto {fried calamari, shrimp and lemon} and the batter was very light, almost like tempura. My spicy king crab with squid ink spaghetti did have a spicy kick to it, but other than that, this dish wasn't too notable.

Ooooeee! That was filling! Can't wait for all the holiday get togethers this month!
 

Thursday, November 22, 2012

Happy Thanksgiving!

From my little family to yours...
If you couldn't tell, this little girl has a lot of personality! She is so so observant and remembers everything she sees/hears, even if only once. She heard/saw me pose my friend once and now girlfriend's got it down! See our card from last year here.
Thanksgiving Cards by TinyPrints

And if you ask her where this picture was taken, she'll tell you, "By the dumpster." Photography tip #1: Don't overlook good light in small spaces! Even with garbage right next to you, literally! Also, like the garage door in our family picture above. In the 15 minutes we had with my tripod and self-timer (not even a remote!) before a torrential downpour, Doug questioned "Why do we have to stand here?!" To which I screamed replied "You don't see what I see!!!!"  Photography tip #2: Trust your photographer's vision.

We have a busy weekend with good food, friends and family. I couldn't be happier or more thankful for everything we are blessed with on a daily basis. May you spend this weekend with your nearest and dearest.

Tuesday, November 20, 2012

Kid's Thanksgiving Activity: DIY Thankful Tree

As usual, the timing of my posts are not a month ahead of the actual holiday, like the rest of the crafty blogging world. But now with Pinterest, you can go ahead and pin this project for next year!

Being a few months shy of 3 years old, Mia is barely preschool aged.  Despite being a young kid, we still opted to do a DIY Thankful Tree as a simple, easy, and free Thanksgiving activity.
Cost: $0
Time: 30 minutes
Materials: colorful paper, tape, marker, scissors, brown paper bag (optional), turkey (optional, came from an old greeting card)
Steps: 
1. For the trunk, I used a brown paper bag that I bring my wine home in. No cutting necessary, just tape right on the wall!
2. For the tree, from 4 sheets of green construction paper, I free-handed unevenly scalloped bushes and taped it to the wall. Use scrap edges for the grass.
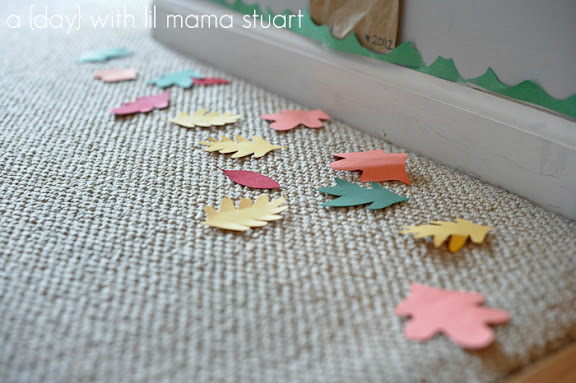
3. For 30 leaves, cut various shapes from various colors of paper. Also free-handed. Fold sheets of paper in half, thirds or fourths to yield multiple leaves from one cut.
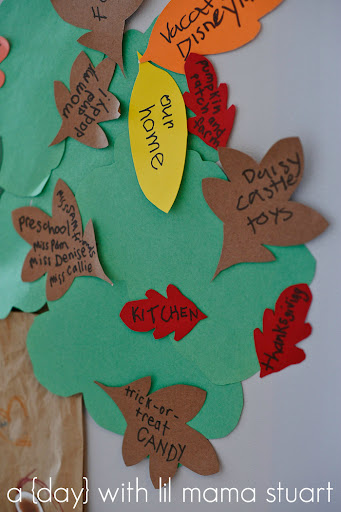
4. Every day, pick a leaf and write what you are thankful for and tape it up!

This squirrel {from one of Mia's school projects} reminds me of the fearless critters on the Quad in college.

I thought of the first few things to be thankful for so Mia could get the gist of what we were doing. Can you guess which ones Mia suggested on her own?
     Birthdays - girl loves to sing the song and party plan like mommy
     School - she cannot wait to go every day instead of just 3 days a week
     Daisy - her stuffed animal Dog
     Castle - a princess one of course
     Kitchen (set) - she cooks every single day, especially while I cook dinner (lifesaver!)
     Trick or treat candy - she has a sweet tooth like mommy!
     Pumpkin patch and farm - her 1st field trip with school, and
     Thanksgiving
We hold the marker together and I write out each letter so Mia can tell me what letter she sees as I spell each word. Great teaching tool! We also read every leaf when we're done to reinforce what we were thankful for on the previous days. Even under the age of 3, I think she gets it. It'll be fun to see how her answers change each year!

linked up with:

Friday, October 26, 2012

Tired.

With a wedding (as a guest)...

...newborn session...

...pumpkin carving party...

...DIY Halloween decorations, a husband out of town all week and a long drive to Michigan ahead of us...lil mama's tired! Details to come on the travel themed wedding, precious Baby Blake and Halloween...But first, a fun weekend for the mini-me cousins!
Have a good one!