Photobucket Photobucket Photobucket Photobucket Photobucket Photobucket
Showing posts with label mom things. Show all posts

Friday, August 30, 2013

Healthy Menu Planning with Fresh Ingredient and Recipe Delivery Service

Recently Doug's coworker invited us to try Relished - a new fresh ingredient and recipe delivery service in Chicago. Of course I jumped at the opportunity to obtain a box full of food prepped by an experienced Executive Chef!

Who should try it?
Relished would be ideal for a wide variety of Chicagoans...
Is it hard to find time to go grocery shopping regularly?
Do you have no idea where to start when it comes to meal planning, finding recipes and certain ingredients? 
Are you bored of your usual go to meals that you cook at home?
Are you sick of spending money on going out to eat and ordering take out when your fridge is empty?
Do you enjoy trying and cooking new foods but don't know where to start? I was able to cook fish (which I almost never do), kale (which I've never purchased in my life), and ginger (which I used to think I didn't like).

How does it work?
As a subscriber, one box of fresh produce and protein is delivered to you each week with recipe cards. This one {insulated} box contains nearly all of the ingredients and instructions you need to cook three meals at home!

What'd I think?
My meals consisted of Rainbow Trout with heirloom carrots and cous cous, Peach Glazed Pork Chops with rosemary potatoes and kale and Asian Chicken with kimchi, snow peas and peppers
+ All three meals had a few ingredients I don't normally use (fish, kale and ginger) which made it all the more interesting to try! Having the ingredients and recipes provided to me makes working with new ingredients less intimidating (where do I find it at the store, how do I cook it, etc). And now I won't mind buying fish or kale and know how to incorporate them into my meals.
+ Everything I needed was perfectly portioned out in labeled containers, making prep a breeze.
+ I also liked how the meals didn't require too many pots/pans/dishes. I try to avoid recipes that result in excessive amounts of dirty pots, pans, bowls, etc that leaves my kitchen looking like a disaster.
+ The recipes were easy to follow and the meals were prepared in my usual dinner prep time, between 30-45 minutes.
+ Most importantly, all three meals were delicious! {I was too hungry to take a picture of the Asian Chicken.}

Now what?
Would you be interested in a service like this? As part of the test group, I gave Relished my honest feedback. I'd love to hear what you think about this whole concept. Relished is now accepting orders - Be sure to check out their website for more information!
 

Friday, August 23, 2013

DIY Bingo Game for Toddlers and Preschoolers

Recently, Mia came home saying she won something out of the prize box at school. Turns out she's been playing BINGO at pre-school! For the 3-5 year olds at school, they were playing  BINGO with pictures. To take the game a step further, I made a custom BINGO game for us to play at home so Mia could practice writing and recognizing the sound of letters - for free! Here's how to make your own free custom DIY BINGO game to play with toddlers.

Materials (instructions for each below)
blank BINGO cards
DIY BINGO markers from cardstock
clip art with a picture for each letter of the alphabet (i.e. apple, banana, cow, dog, elephant, etc)
Cost: ZERO!

Instructions: blank BINGO cards
1. Open a word doc. Or just search the internet for one to print off.
2. "Insert" a "table" with 5 rows and 5 columns. Right click your table and go to "table properties". Set each row to be 1.5 inches.
3. Type BINGO at the top, above your table. Adjust letter size and spacing as necessary. Don't forget to type FREE in the middle box!
4. Print as many as you'd like!

Instructions: BINGO markers
1. Use a craft punch to punch circles out of card stock. If you don't have a craft punch, use scissors or a paper cutter to cut squares. The number you'll need will depend on the number of players (at least 25 per player). My pink and grey circles are Valentine's Day party leftovers (via The TomKat Studio) and the purple circles are leftovers from Mia's Winter ONEderland birthday party.

Instructions: clip art for each letter of the alphabet
1. Open a new word doc.
2. Search for clip art for each letter of the alphabet and copy and paste into the word doc. (i.e. apple, banana, cow, dog, elephant, etc). I liked the free clip art at mycutegraphics.com. She even makes it easy by having pictures for each letter readily available.
3. Double click the image in the word doc and resize the height/width to be 1 inch. All 26 images should fit on one page.
4. Evenly space out each image on the page so your toddler can easily cut each picture out with straight lines.
5. Print and have your pre-schooler cut each picture out. 

How to play:
1. On the blank BINGO card you printed out, have your pre-schooler write one letter in each box. Don't duplicate any letters. Have each player do this for their own cards.
2. Put all pictures in a container (box, basket, bucket, etc).
3. Have your toddler pull out a picture. Have them figure out what the first letter for that picture is (i.e. apple = A). If that letter is on someone's board, they can mark it with a BINGO marker you made.
4. Take turns pulling pictures and continue play until someone gets 5 in a row!

Mia was super excited to play with us and I don't even think she realizes that she's "learning" at the same time!
 

linked up with Tatertots and Jello

Monday, July 15, 2013

Easy Homemade Popsicle Recipes

When my Amazon package of Zoku Popsicle Molds came in, I told my neighbor (who creepily coincidentally has the same name. and birthday as me) that I was going to make popsicles. She gave me a weird look saying, "Who has time for that!?!" But let me assure you friends, homemade popsicles take all of 5 minutes to make (not including freezing time of course). Here's a few simple, healthy homemade popsicle "recipes" that I like to make with whatever fruit I have on hand and the help of my three year old. She gets to put fruit in the blender, press the button when I give her the ok and put the sticks in.

Typically I just eyeball the amounts and a little goes a long way. Popsicle molds don't hold much - just a few ounces each! My new Zoku pop molds make six regular sized popsicles. My 25 year old popsicle molds from when I was a kid make eight small popsicles, perfect size for kids. Or you can use wooden popsicle sticks and dixie cups, but I don't like the short/fat/round shape with this method. It's just not as lickable as a regular shaped popsicle.

Just wash and cut fruit, blend, pour, and freeze!
Watermelon: 2 cups cubed seedless watermelon + squeeze of lime (optional) + sugar (optional)
Mixed Berry Yogurt: 1 cup of any combination of berries (hulled strawberries, raspberries, blackberries or blueberries) + 6 heaping tablespoons of vanilla yogurt + few tablespoons of sugar depending on natural sweetness of fruit (optional)
Mango: 1 mango, cubed + 1/2 cup of orange juice + a few cubes of ice + squeeze of lime (optional) + sugar (optional)

The mango is my favorite. I can't wait to try other combinations like peaches + yogurt, pineapple + OJ, lemonade + berries, and mimosa pops for the adults. Fresh fruit popsicles are the perfect treat for hot summer days!

And you may have to clean your toddler's clothes right after. That berry face looks like one satisfied customer!
 

linked up with Home Stories AtoZ

Thursday, May 16, 2013

Two Days in Vancouver with a Toddler

So you read about the first half of our Seattle/Vancouver trip here, right? After brunch at the 5Spot, we drove 2.5 hours from Seattle up to Vancouver, BC, Canada. It was an easy drive filled with beautiful green grass, lush trees and snow capped mountains - which obviously does not compare to the vast cornfields of the Midwest. Read on in case you're wondering what to do in Vancouver with a toddler.

The line of cars to cross the border wasn't bad either, probably waited about 10 minutes. Here's what we did and where we ate during our 2 day trip in Vancouver, although I wish we had another 2 days to do more!

What we did:
1. Two hours atop Grouse Mountain (Expensive at $40/per person!) Makes more sense to go if you are a skier or snowboarder - which we are not! But, the tram ride up gave way to outstretched views of the city, waterways and Stanley Park. We visited the two resident bears that live there and that's about it.  I’m disappointed we didn’t do a FREE outdoor activity instead at Lynn Canyon Park to walk the suspension bridge and take in some nature. But, it wasn’t MY birthday after all. Maybe next time! This was the only time we needed a car while in Vancouver.


It was a very warm and sunny day on the mountain and the snow was slushy. Doug was exhausted, hot and sweaty while trekking/carrying Mia through the snow to get to the Bear house.


2. Two hours at Granville Island Public Market (free) - We walked across town (literally) and over the Granville Bridge to get to the Public Market. We DO NOT recommend walking this bridge and we should’ve taken the bus! The Public Market full of fresh produce, artisan cheese, charcuterie, meats, fish and flowers makes me want to throw a dinner party! There are a lot of food vendors, so we enjoyed a banana Nutella crepe out on the dock. There was also a Kids Market full of useless retail aimed at children, but kept Mia busy hopping on and off the coin rides (which she doesn't know you put a coin in to make the ride go!) 

3. Two hour bike ride around Stanley Park ($30 for all three of us) -  Now that we knew not to walk back into the city from Granville Island, we took a bus back downtown to rent bikes from Stanley Park Cycle (cheaper than the more obvious store on the corner). For less than $30 for the three of us, we rented bikes to take a 2 hour leisurely cruise around Stanley Park’s Seawall. We stopped very frequently to take in the view of the modern city surrounded by water and mountains. I definitely enjoyed this activity more than the expensive mountain! Make sure you're going counterclockwise around the Seawall because at one point it becomes one way.

After our leisurely bike ride (unlike the one in Chicago), we walked along the water by Coal Harbor to get back to the hotel. The docked boats (and house boats!!) were surrounded by towering glass condos. But what I could not get enough of were the seaplanes that would frequently land and take off! Who’s in these little seaplanes and where are they going!?

What I wish we had 2 more days for:  Whale watching and exploring Lynn Canyon Park.

Where we ate:
Dinner - Salmon House Since we still had the car, we drove up to West Vancouver. The ceiling to floor windows allowed us to sit back and relax while enjoying the sights of the water, city and trees. Given that our reservations were at 6pm when it wasn’t busy, our food came out very quickly. But once we were finished, it was very difficult to flag our waitress down and we waited a good 30 minutes for dessert to come out (you can even tell how long it was from the melted sorbet below!!). What started as a pleasant dinner turned into a 2 hour affair - which is long when you have a toddler in a different time zone! Mia ordered pasta off the kids menu. We started with the chili, lime, prawn and salmon spring rolls, Doug had the grilled seafood trio while I worked my way through half a Dungeness crab, lobster tail and scallops. All the food was good, but not amazing. However, the concorde chocolate cake with raspberry sorbet was delish.

Breakfasts -  Thank you Pinnacle Marriott for the complimentary pastries, fruit and Starbucks coffee every morning!! Spending $0 on two light breakfasts let us indulge more at lunch and dinner.

Lunch - Edible Canada Bistro While at Granville Island, we had lunch at the conveniently located Edible Canada, a modern bistro featuring New Canadian cuisine. Mia ordered grilled cheese and fries from the kids menu and kept busy with their crayons and coloring sheet.  Doug had the wild westcoast ling cod fish and chips - the best fish and chips he's ever had! It was so so light and not heavy like your typical fish and chips that we've had in the States. To continue our seafood tasting trip, I thoroughly enjoyed my mussels with housemade chorizo and duck fat fries. SUCH a good lunch!

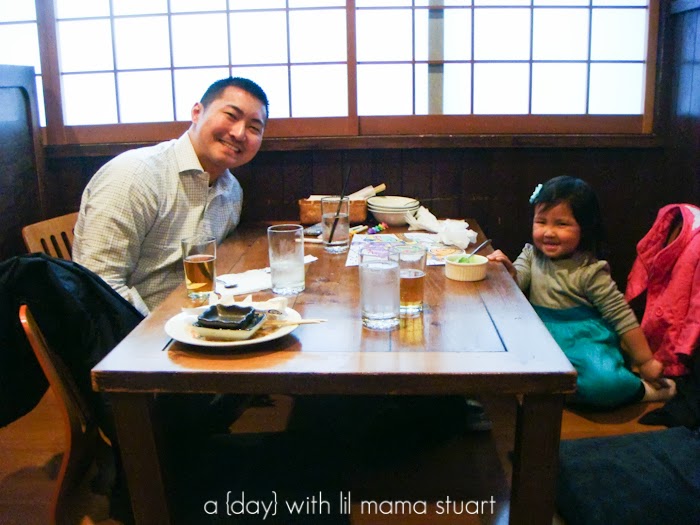
Dinner - Guu on Robson Street Since we didn’t want to walk across town for dinner at Minami in Yaletown (didn't have a car anymore), we changed our reservations to an Izakaya (Japanese style tapas/small plates). Guu is very small, with sushi bar type seating, communal tables, cafe tables outside or traditional shoes off/tatami mats/low table intimate seating upstairs. The energy level in this restaurant is sky high with the servers yelling out orders throughout the restaurant and bumping music (but not annoying). Mia loved it. She felt like she was on stage and danced through 80% of dinner. She ate rice while we ate our way through yaki udon, kimchee udon, fried chicken wings, fried prawns, beef tataki and a pitcher of Sapporo. The beef tataki with plum dressing and wasabi mayo was melt in your mouth ah-mazing!


Where we stayed: Vancouver Marriott Pinnacle Downtown, less than $150/night thanks to kayak.com
After our mountain adventure complete with wet shoes, socks and pants, the familiar smell of the Marriott as I approached the lobby put me in a better mood. If you ask Mia, her favorite part of the trip was the hotel. With a corner room, entire wall of windows looking over the water, sea plane dock and mountains (see below), king bed and complimentary desserts for Doug’s birthday, I don't blame her. We love Marriott hotels! AND there was complimentary Starbucks coffee, pastries and fresh fruit every morning!


Saturday morning we walked to the Sky Train with all our luggage through the morning drizzle and headed back to the airport. Apparently they are on the honor system because no one checked for our transit tickets. Ohh Canada! At the YVR Airport, security and customs was a breeze, with no line for either and super friendly TSA agents. Then to our delight, there was a playground and TV area for kids to burn off energy before being confined on a plane. Yet another reason why we love Canada!

While waiting for our plane to arrive, Mia wanted to take pictures. Just like mommy! She did a good job didn't she?! (The pictures she captured are on the right, and the airplane.)

And that's our four day trip recap of what to do in Seattle and Vancouver with a toddler. Have you been to Vancouver? What did I miss? What was your favorite? Where should we go next year for our family vacation??


Wednesday, May 15, 2013

One Day in Seattle with a Toddler

Last year, we celebrated my {golden} birthday with a long weekend in Boston. This year, for Doug's 30th birthday, we flew {with miles of course} to the opposite coast to explore the Pacific Northwest. With two nights in Seattle {stayed with family, score!} and two nights in Vancouver, Canada it was a refreshing family getaway. Read on to see how we spent one {real} day in Seattle with a three year old and check back tomorrow for our trip recap of Vancouver, BC.
Nothing better than big squishy hugs for mommy as we wait to board the plane.
After landing in the late afternoon, we spent our first {half} day in the suburbs with family and explored the piers at Redondo Beach. Clear skies, sunshine and lush greens were a refreshing escape from Chicago's cold and dreary start to Spring. I wish we saw people crabbing though! Maybe next time.

The next day, we had one full day to explore downtown Seattle. And honestly, by the late afternoon I was surprised that there wasn't anything else we wanted to see or do in the city! Here's what we did and where we ate.

What we did:
1.  2 hours at the Space Needle - $40 for 2 adults and 2 kids under 3
2.  Olympic Sculpture Park - let the kids run around outside while taking in the gorgeous views for free
3.  1 hour at the iconic Pike's Place Market for free
* We had a car and street parking was easy to find and cheap (anywhere is cheaper than Chicago!)
* I had no idea Seattle was SO hilly - as steep as San Francisco!
* We did not go to the piers since it was naptime, we saw the amazing views from the above three places and figured it wouldn't be much different from Chicago's Navy Pier (tourist traps, selling crap kids don't need, etc)

Where we ate:
* Breakfast - Top Pot Donuts really good coffee and better than your average donut, but not amazing.
* Lunch - Pike Place Chowder quick light lunch outside, delicious chowders and Dungeness Crab roll. FYI - it's located in a commercial/pedestrian alley.
* Dinner - Ray's Boathouse (20 minutes north of the city) we loved sitting at the window right on the water as the sun was setting, but wished we were outside.  While yelp said it wasn't good for kids, I didn't feel out of place bringing our {well behaved} 3 year old. She ate the bow-tie pasta for her meal while Doug and I started with the Spot Prawns. Doug's Grilled Spring Run King Salmon was so fresh and the perfect amount of char while my Sablefish in Sake Kasu was so light and buttery, but unfortunately too salty.
* Brunch - 5Spot casual diner in the Queen Anne neighborhood. Doug didn't care much for his Red Flannel Hash (corned beef, beets and poached eggs), but I LOVED my bacon and candied pecan praline pancakes with caramel syrup and a side of hash browns. Mia enjoyed her Mickey Mouse pancake and its always a plus when her meal comes with fruit.

Enjoying our Top Pot Dougnuts on the go before hitting up the Space Needle an hour after it opened.


So being my first time to Seattle, I was expecting the Space Needle to be this towering fixture in the skyline. I was a little disappointed to see how tiny it was amongst the cityscape! Can you spot it??
But nonetheless, it was a gorgeous day with beautiful views of the city, water and mountains. And I'm all for activities that keep the kids busy and they're still free!


Afterwards we drove a few minutes to Olympic Sculpture Park where the kids could run around while we take in some more gorgeous views. Someone thoroughly enjoyed being outside spinning, twirling and singing princess songs as we soaked up the sun.
People thought they were twins in their matching outfits. But really they are {second} cousins and 9 months apart.

Then it was time to see the iconic Pike's Place Market where everyone says you must see them throw the fish!! Unfortunately, we tried twice. And saw no fish throwing! I admired the lush and super affordable fresh flowers and longed for open-to-the-public floral markets in Chicago.

We grabbed lunch at Pike Place Chowder, which is hidden in the Post Alley. It was a quick, casual, delicious and somewhat outdoors. The kids ate pizza from the store next door.

After that, we didn't really have much else to do! Seattle can definitely be explored in one day. Or did I miss something?? Good thing we had a car, so Mia could take a long nap. Before going up to Ballard to eat dinner at Ray's Boathouse, Doug and I drove around Mercer Island checking out million dollar homes with our redfin app.

Then that was it for our one day in Seattle with a toddler! The next morning we ate brunch at the 5Spot and we began our 2.5 hour drive up to Vancouver, BC, Canada. Well, after Doug was issued a couple hundred dollar ticket for going 35mph in a 20mph school zone. On his birthday. On vacation. At 930am when kids should already be in school!!


Thank you to my aunts and cousins for hosting us! Have you been to Seattle before? What'd you think? Did I miss something? Check back tomorrow to hear about the rest of our trip in the Pacific Northwest!