Photobucket Photobucket Photobucket Photobucket Photobucket Photobucket
Showing posts with label as seen on. Show all posts

Wednesday, August 7, 2013

As Seen On {Tiny Prints}

This week, I had the pleasure of being featured on the Tiny Prints blog! If you're stopping by from there, I hope you take a peek at the other parties I've styled.  Thanks Tiny Prints for having the perfect invitation for my pink, gold and glittery 30th Birthday Party! If it weren't for finding this invite, I might not have had a party at all!

Friday, June 28, 2013

June Instagram Highlights

Remember back in December, I finally hopped on the Instagram bandwagon? Since then, I've been doing Fat Mum Slim's photo-a-day challenge (#fmsphotoaday). For each day's prompt, Chantelle features four photos that catch her attention. Yesterday, my "empty" photo (top left) made the cut!

Here's a few of my favorite June photo-a-days:
 06.08.2013 animal - Daisy talking to Daddy

 06.09.2013 from down low - Doug's best friend gets married!
06.10.2013 you - and the entire city has Blackhawks fever! 2013 Stanley Cup Champions!

06.16.2013 family - love love love my parents' backyard, the hammock I've been using for 30 years and the new swing Grandpa made for hours of fun

06.21.2013 lunchtime - in the loop

6.22.2013 enjoying life - down at the lakefront, a little family tradition

06.27.13 into the sun - after a quick summer shower, the daunting clouds disappeared and the sun shone down in full force. My flowers love it!

 Are you on Instagram? You can follow me at instagram.com/lilmamastuart I'm shooting a downtown wedding on Saturday and Baby Joey on Sunday. What's on your agenda??
 

Tuesday, June 4, 2013

How to Make a DIY Fringe Party Backdrop

A reader asked me how to make the DIY fringe party backdrop seen in my Glam 30th Birthday Party featured on Hostess with the Mostess. I wrote this tutorial up so you can easily recreate the look for upcoming events. This is for you Brittany!

I was inspired by the DIY project over at Shiny Happy Sprinkles, but didn't want to bust out the sewing machine. Here's a DIY fringe backdrop tutorial that is no-sew, requires 4 basic materials, is super simple (you know how to use scissors right?!), and budget friendly (only real cost is tissue paper). The time it takes and amount of tissue paper you'll need depends on the desired backdrop size. I just covered my TV, so I only needed 10 sheets of tissue paper and 30 minutes the night before my party.

Time: 30 minutes - will vary depending on desired size of backdrop
Materials:
- Tissue Paper (10 sheets covered my TV - will vary depending on desired size of backdrop)
- Ribbon/String
- Tape
- Scissors
Cost: $5
Instructions:
ONE - Cut a piece of string a little bit longer than the desired length (horizontal) of your backdrop. For me, this was the length of my TV + a few inches. Open two sheets of tissue paper next to each other to make one long piece (or as many sheets as necessary for your desired backdrop length). Place string down the middle (horizontal), tape it down in just a few spots.
TWO - Fold tissue paper in half over the string.
THREE - Keeping (a) the ribbon in place at the top and (b) the top fold in line with itself, fold your tissue paper in half, and then half again and one more time. This will speed up the cutting process so you cut through multiple layers of tissue paper.
FOUR - An inch from the left, cut vertically from the opening (bottom) of the tissue paper to the top (towards the ribbon), without cutting through the ribbon or fold. You do not need to cut perfectly straight or even lines. Repeat cutting inch wide strips, all the way across the length of your tissue paper.
FIVE - For some texture, crumple up the strips a bit and then smooth them out. Unfold your tissue paper. You just created a row of fringe!
SIX - Pick up each end of the string, with tape handy, and from the bottom of your wall, tape the fringe in place.
SEVEN - Repeat steps 1 through 6 to create each row of fringe until you reach your desired backdrop height. Tape each row right above the last, with some overlap.
{My little party planning assistant}

And that's it! What do you think? Cheap and easy with a big wow factor, right!? My favorite kinda projects! You can check out other parties I've styled here and other cheap and easy DIY projects.

linked up with Home Stories AtoZ and:

Tuesday, May 21, 2013

As Seen On {Hostess with the Mostess}!

Last Mother's Day, a party of mine {Erin's Pink & Green Polka Dot 1st Birthday} made it into a Hostess with the Mostess Party of 5 weekly round up. While I considered that an accomplishment in itself, I can finally cross a huge goal off my personal blogging and party planning bucket list....Getting a full party feature on the amazing Hostess with the Mostess party site! {Yipppeeee!!} 

You can catch my  Glam Favorite Things {30th} Birthday Party on HWTM today!  
If you're stopping by from HWTM, you can check out my other featured parties here or browse all parties I've styled here. Thanks for popping in, I hope you see something you like and stick around to see what else I come up with!

Thursday, March 21, 2013

Sweet Surprises

Happy {almost} Friday! If you're stopping by from Mia's Princess Ballerina Party featured on Kara's Party Ideas today, hiiii!  Feel free to check out other parties I've styled here.

My baby girl's birthday party knocked two things off my {unwritten} blogging bucket list - getting featured on Tatertots and Jello and Kara's Party Ideas! Yippee, thank you ladies!

Another recent sweet surprise was a package I received from Pick Your Plum. I knew I hadn't placed an order with the daily craft deal site recently, so I wasn't sure what was inside.
After sharing how I used their french fry cups, PYP sent me more goodies to DIY my little heart out! The hand-written note topped off this sweet little Thank You package. Now that is customer service that keeps people around. 

Speaking of DIYing my little heart out, I better get started on the party I'm hosting next weekend!

Friday, February 22, 2013

Princess Ballerina Birthday Party Decorations

**Thank you Jen for the feature on Tatertots and Jello!**

My 3 year old daughter is such a girly girl who loves to wear dresses, sing and dance around (to a made-up song where the only words are "Iiiii'm a prinnnnnnnnnnncessssss...."), pretend to do makeup, carry purses, wear jewelry and of course loves princesses. So sure enough, what was more fitting than a Pink Princess Ballerina Birthday Party full of sparkle and glitter??
Hey there! That's me - party stylist, photographer and lil mama!

If you're new around here, I'm all about DIY, thinking outside of the box and being resourceful to use what you already have to keep costs down. Keep reading for some of my party planning tricks. 

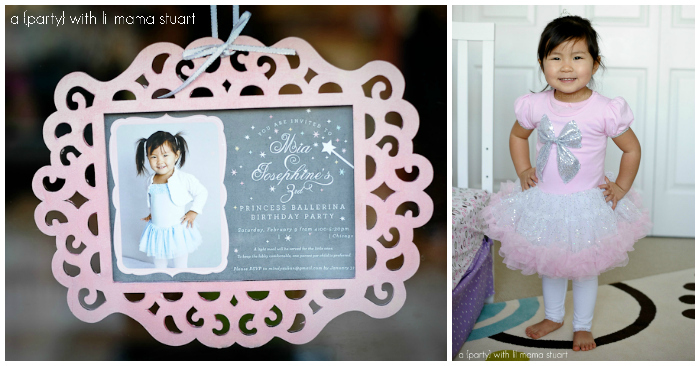
I pretty much based the entire theme and decor on this invitation and dress. Couldn't be more perfect! And yes, she has that sassy pose down. She's well on her way to being a Misha Media client! Click here to see my full party inspiration board.
{Wooden frame from Michael's painted with acrylic paint}

Come on in!
{DIY Tulle Doorway Swag with glitter ribbon from Michael's, similar to what I did for Erin's 1st birthday party}

{Mia liked helping me paint the frames. Then I printed "Happy Birthday" on regular computer paper, traced it with glue and glittered away! I made the star garland with a craft punch from the MonSTAR party and thread}

Someone was excited to greet her guests!
It was SO nice to have Mia's old dance instructor at her party. Just like mommy, Mia is the smallest one.

{Love how this cake stand can go from a boy's monster party to a sweet ballerina party. "Help yourself" banner made with picmonkey.com. No fancy water bottle labels, simply wrapped them in scrapbook paper.}

{Sparkle hydrangeas from Mia's Winter ONEderland party. To add height to the cake stands, I flipped trays upside down.}

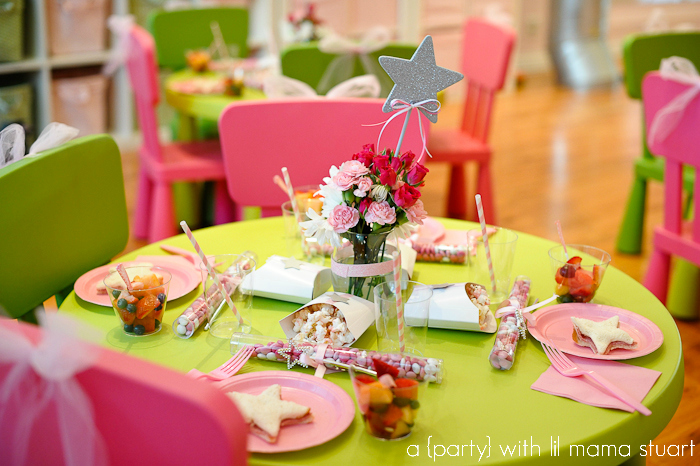
Table settings fit for a dozen 3 year old princesses...
{Every little guest went home with favors of pink and white M&M's with a princess star wand.}

{Silver glitter wands for a $1 from Target's party section. Dig through those bins!!}

{I prettied up the popcorn/french fry boxes with a simple ribbon and star from cardstock.}

{Party food for the girls included star shaped salami and cheese sandwiches, pink chocolate covered popcorn, fruit cups and milk with pink striped straws.}

Told you she has quite the personality! I wish I could bottle up her sweet little voice too!

{Think outside the box! The flower centerpiece vases are actually stem less wine glasses wrapped with glitter  tape from Shop Sweet Lulu. Flower arrangements are rearranged from grocery store bunches - 3 for $12.}

{Semi-homemade pink velvet cupcakes from a World Market box mix atop tutu skirted cake stands. Mia's cupcake is topped with a number 3 made out of sprinkles.}

Love you, your animated personality and big squishy hugs, sweet heart!

Vendors:
Party Styling and Photography: a {day} with lil mama - me!
Venue: Baby Take a Bow
Invitation: Brightside Prints via The House of Smiths
Sparkle Tutu Dress: Nordstrom
Glitter Tulle and Glitter Ribbon: Michael's
Glitter Wands: Target
Star Wands: Party City (cheaper than Oriental Trading)
Favor Tubes: Pretty Sweet Stuff via Very Jane and Shop Sweet Lulu
Popcorn/French Fry Cups: Pick Your Plum

Thank you to my mom and best friend for helping with the set up. And to my husband who hates glitter and lived with a pile of pink party supplies for a few months!


linked up and as seen on Tatertots & Jello

Friday, October 19, 2012

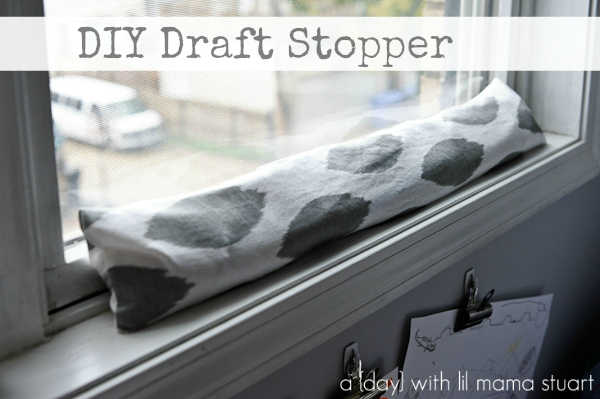
DIY Draft Stopper Tutorial

Happy Friday everyone! With cool, crisp Fall air among us, are you layered up trying to keep warm? When the temperature drops and the heat goes on, we start to feel a chilly draft come through our windows and fireplace. I used to roll up towels to keep the draft out, but now...I have a prettier solution for all of us!

Stop on over to How Does She where you'll find my step by step tutorial to make your own DIY draft stopper. If the rain holds off and I can take pictures of Mia this weekend, I'll have a DIY Halloween costume tutorial for you on Monday!

This weekend I'm attending our first wedding of the year, where I'm not the hired photographer! How about you?


linked up here: