


With picnik.com closing and becoming a Google product, a lot
of bloggers are stuck looking for online photo editing alternatives. Aside from designing basic
party printables, I relied on picnik for watermarking images on my blog. Today I'm incorporating ideas from MADE and Kent Weakley to show you {in less than 10 steps} how to (1) download free fonts, (2) create
a .png watermark file with transparent background and (3) how to watermark an
image without Photoshop.

PicMonkey and ipiccy are free online photo editing sites, but
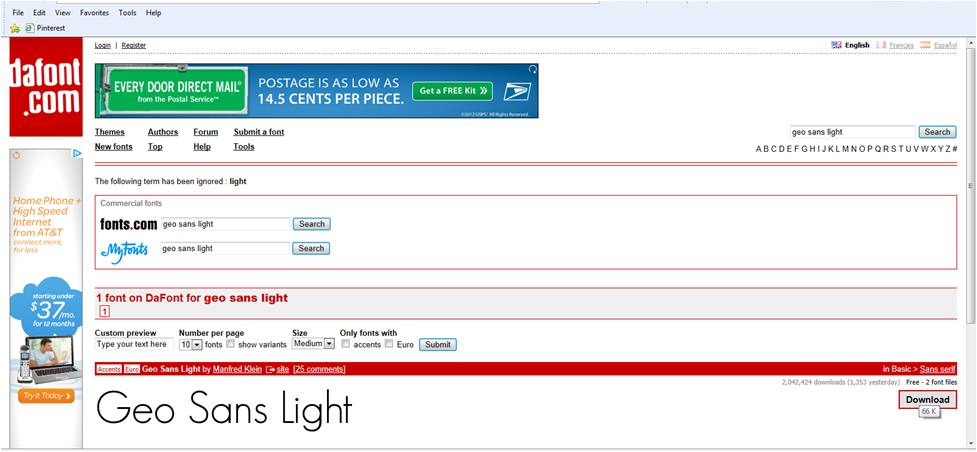
they don’t offer the font I use to watermark on my blog (Geo Sans Light). Fotoflexer.com doesn’t have my font either, but it does allow adding an image (my
watermark) as a layer onto an existing
image (the image I want to watermark). PERFECT! Fotoflexer also integrates
with Picasa and other sites, which makes it easy to create your own blog buttons {as a
blogger/blogspot user}. Come back tomorrow to learn how to make your own blog button.
- Download font {for FREE from dafont.com or another source}.
- Install font on computer: I'm on Windows 7 and all I had to do was unzip the files I downloaded and right click on "Install".

- Create watermark in Microsoft Powerpoint: Insert text box. Type using your new font. Resize as big as you can. Change colors as desired. I like my watermarks to be white, but left it black in the following steps so you could see my text.

- Make background transparent: Right click on the text box à click on the paint bucket à select "more fill colors". At the bottom, set "transparency" to 100%

- Save the text box (not the powerpoint file) as a .png file: Right click on the edge of the text box à click on "Save as Picture". Select "png" from your drop down of file types.


- Upload picture to be watermarked to fotoflexer.com. My picture is already fully edited and just needs a watermark. If you need to edit yours, do so now.
- On the "Layers" tab, click on "Add images." Select your .png watermark file. Adjust the size and placement. Change the opacity if you want.


- Save, done!

See! Who needs Photoshop!? Just kidding, I would love Photoshop. Would you like to contribute to my Photoshop fund?? My husband would appreciate it. J


10 comments:
You are seiously the bomb for posting this! I made it one of my "goals" to start watermarking my photos in 2012 -- and I have yet to do that because other ways I've tried take soo freakin' long -- but this seems simple and quick. Thanks again dear!!
Thanks for posting this. Creating a watermark for a mac seems so challenging. Downloaded jetphoto but you have to create a png transparent image. This is helpful, though my version of powerpoint is different. I find the transparency section but I can't change it. any ideas?
This is a fabulous tutorial. I've just followed it to create watermarks for my small business website images, which are being regularly pilfered. Thanks so much for sharing!
Thanks so much for posting this!! I'm just starting out in the blogger world and knew I wanted to watermark my photos, so this really did help me so much!
Thanks this was great, I really needed this!!!!
Really thanks to publisher that post this article. i try so many things to add watermark to photo but there are only two ways with that you easily add watermark to image. one is you mention in your post and another one is, by using app named "auto stamper" which also offer simple and easy way to create and add own signature in your photo.
First up thanks for sharing your Knowledge!! The solution that you have given in the Blog is fulfilled with PC or Laptop on hand but there are also many watermark Application available in Android and iPhone by which you can add text to a photo easily on the Go like Auto Stamper and Timestamp Camera. Hope it helps too!
I am thankful for this blog to gave me much knowledge regarding my area of work. I also want to make some addition on this platform which must be in knowledge of people who really in need. Thanks. watermarking software
I Love your article. You cant visit my website : what is gangstar vegas
Very interesting, good job and thanks for sharing such a good blog. Your article is so convincing that I never stop myself to say something about it. You're doing a great job. Keep it up.
Remove object from photo
Post a Comment