Photobucket Photobucket Photobucket Photobucket Photobucket Photobucket

Friday, June 14, 2013

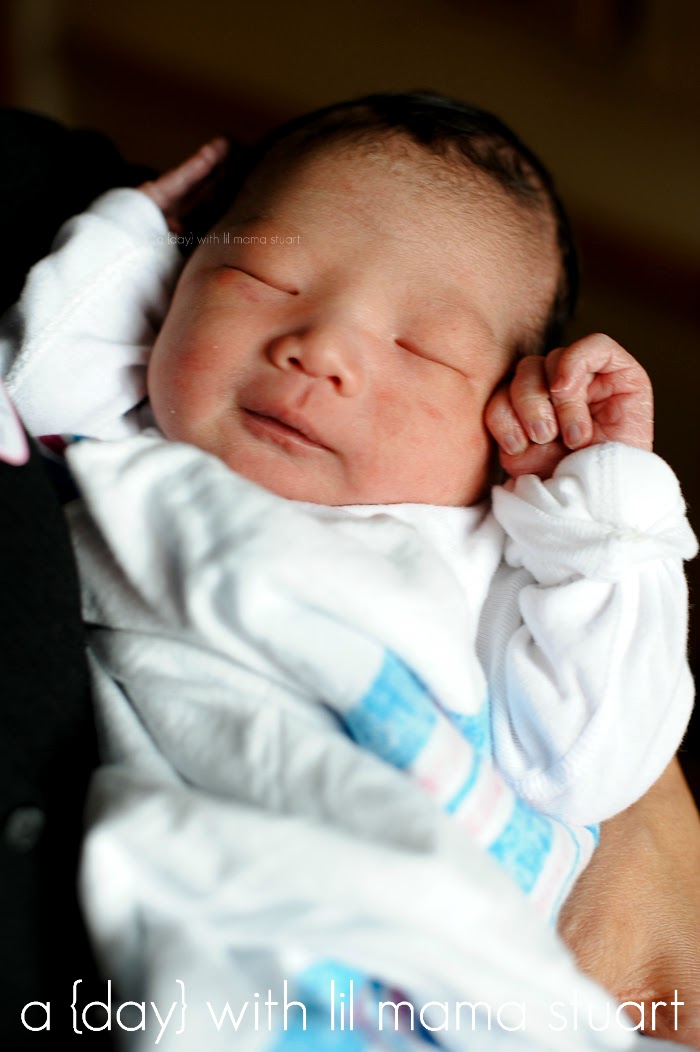
ANOTHER baby boy!

Since last fall, every newborn baby that has graced the front of my camera has been a BOY! There was Blake in October, Corby in November, Evan in December, Joey in January and Luke in April. Can you believe it?! I haven't photographed a single newborn baby girl since then!

After the excitement of Doug's best friend's wedding on Saturday, we met our nephew on Sunday, just five hours after he was born. A few days after his due date {just like his sister Erin}, my sister in law felt her first contraction at 6AM. After a phone call to make baby sitting arrangements and less than four hours later, Steve and Sandy welcomed their 9lb 6oz, 22 inch Baby Benson into the world! His official newborn portrait session will take place in the next two weeks, but I just couldn't keep my camera away during my short 15 minute hospital visit!

Enjoy your Father's Day present Steve!

Thursday, June 13, 2013

My Best Friend's Wedding

Ok so it wasn't my best friend's wedding (get on it Agatha!). But it was Doug's. After ten years in the making, JC and Shannon are officially husband and wife! While JC was one of Mia's first and only visitors at the hospital when she was born and Shannon is one of our only trusted friends to babysit, they gave our daughter the honor of being one of their flower girls. Mia has been preparing for this day for over a year! Literally! Humming "Here Comes the Bride...", making a random piece of tulle into a veil, having daddy be her groom, and walking up and down pretend aisles. My three year old girly girl was excited, to say the least, to take part in Uncle JC and Auntie Shannon's special day.  

**These photographs were made on a personal level, as a guest to the wedding of a couple very near and dear to us. 
To see my team's professional wedding portfolio, hop on over to the Benchmob's newly redesigned site.**
 "Mommy, I look like a little bride!"

Mommy on the way to church: "How do you feel today?"
Mia: "I'm so happy!"

 The little ring bearer had a relaxing wagon ride down the aisle complete with snacks, led by little man Lucas.

Mia handled the super long aisle and onlooking guests like a pro.

 And received compliments for behaving so well during an hour and a half long mass.

I love wedding ceremonies where the bride and groom's wishes for each other are read aloud for all their guests to hear.

Is he the happiest guy in the world or what!?

Mia followed the newlywed couple and led the bridal party recession as if she's done this before.

I really do not think JC could be any happier. Love you two!

As the crowd dispersed, this little lady didn't notice anything that was going on around her...simply enjoying her bubbles on a gorgeous day in June. And I didn't even place her in the middle of the church steps!

Mia was very disappointed that she couldn't go on the trolley with daddy and the bridal party. But after her nap, she was refreshed and ready to party!

Our friend: "She's a natural at the bar!" Doug: evil Idon'twantmydaughtertoevergrowup glare

These two are such an emotional pair.

Although walking down the aisle was exciting, I think Mia was even more excited about the dance party. We expected her to dance with mommy and daddy, hand in hand. But instead, we had a flash forward to our future...She repeatedly brushed our hands away to run off with other kids her age and didn't look back!

These boys have come along way from junior high. I'm glad we have solid friends to share such life changing moments with. Congratulations Shannon and JC! You've accomplished so much in the past year and half and we'll be right by your side for what's to come! What better way to spend your birthday than with all of your friends and family? Happy Birthday Uncle JC!
 

Wednesday, June 5, 2013

{Corby} - 6 months

On numerous occasions, Mia's mentioned how Baby Corby {her teacher's son} doesn't come to school anymore. When I came home from Corby's six month portrait session this weekend, Mia was anxious to see the photos right away! I know I say this every time, but six months is such a happy smiley age!
Love his long dark eyelashes!!

Until next time lil man!
Click here to see more babies and how they get so big! 
 

Tuesday, June 4, 2013

How to Make a DIY Fringe Party Backdrop

A reader asked me how to make the DIY fringe party backdrop seen in my Glam 30th Birthday Party featured on Hostess with the Mostess. I wrote this tutorial up so you can easily recreate the look for upcoming events. This is for you Brittany!

I was inspired by the DIY project over at Shiny Happy Sprinkles, but didn't want to bust out the sewing machine. Here's a DIY fringe backdrop tutorial that is no-sew, requires 4 basic materials, is super simple (you know how to use scissors right?!), and budget friendly (only real cost is tissue paper). The time it takes and amount of tissue paper you'll need depends on the desired backdrop size. I just covered my TV, so I only needed 10 sheets of tissue paper and 30 minutes the night before my party.

Time: 30 minutes - will vary depending on desired size of backdrop
Materials:
- Tissue Paper (10 sheets covered my TV - will vary depending on desired size of backdrop)
- Ribbon/String
- Tape
- Scissors
Cost: $5
Instructions:
ONE - Cut a piece of string a little bit longer than the desired length (horizontal) of your backdrop. For me, this was the length of my TV + a few inches. Open two sheets of tissue paper next to each other to make one long piece (or as many sheets as necessary for your desired backdrop length). Place string down the middle (horizontal), tape it down in just a few spots.
TWO - Fold tissue paper in half over the string.
THREE - Keeping (a) the ribbon in place at the top and (b) the top fold in line with itself, fold your tissue paper in half, and then half again and one more time. This will speed up the cutting process so you cut through multiple layers of tissue paper.
FOUR - An inch from the left, cut vertically from the opening (bottom) of the tissue paper to the top (towards the ribbon), without cutting through the ribbon or fold. You do not need to cut perfectly straight or even lines. Repeat cutting inch wide strips, all the way across the length of your tissue paper.
FIVE - For some texture, crumple up the strips a bit and then smooth them out. Unfold your tissue paper. You just created a row of fringe!
SIX - Pick up each end of the string, with tape handy, and from the bottom of your wall, tape the fringe in place.
SEVEN - Repeat steps 1 through 6 to create each row of fringe until you reach your desired backdrop height. Tape each row right above the last, with some overlap.
{My little party planning assistant}

And that's it! What do you think? Cheap and easy with a big wow factor, right!? My favorite kinda projects! You can check out other parties I've styled here and other cheap and easy DIY projects.

linked up with Home Stories AtoZ and: