




Photobucket Photobucket Photobucket Photobucket Photobucket Photobucket

Monday, October 22, 2012

DIY Wings - Ladybug Halloween Costume

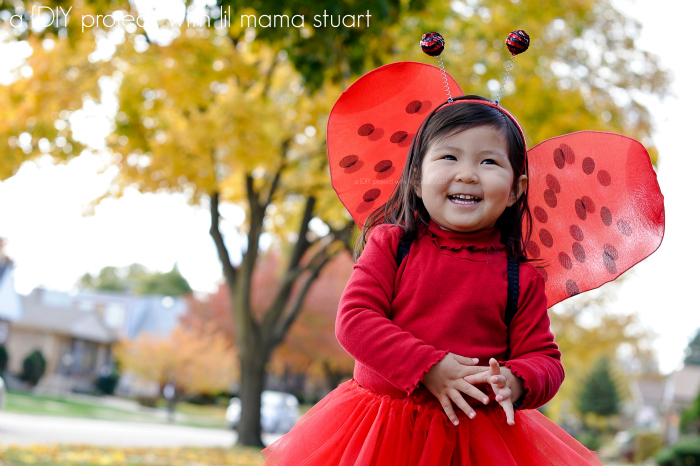
How many of you are still scrambling for a Halloween costume? For once, I didn't wait until the last minute to whip up Mia's DIY costume! How cute is this little ladybug girl?

Her first Halloween, I made her into a bunny.

The year after that, we turned her into a puppy, just like her favorite stuffed animal, Daisy.

This year, despite her first choice of wanting to be a princess (shocking), I suggested my 2.5 year old to be Ladybug Girl!

Yes, you could easily purchase a ladybug costume. But the thought of cheap polyester gives me the heebie jeebies. So today let me show you how to make your own ladybug, fairy, butterfly, bee or angel wings for less than $5.

Time - 30 minutes

Cost/Materials
$0 - 2 wire hangers (from our dry cleaning - use ones that are easily bendable)
$4 - thin nylons/tights (found mine at Joann's for 60% off - don't use thick tights or it won't stretch as easily)
$1 - 2 pieces of stiff felt
$0 - elastic (had some in my stash)
- needle/thread
- hot glue gun
- fabric glue (not necessary, but I trust it more than hot glue)

Instructions
1-2. Take your wire hangers and stretch them out to your desired wing shape. Bend out any kinks for a smoother shape.

3. Slip each leg of your tights over a hanger. Reshape hangers as necessary to get desired shape and smooth out tights.

4. Place wings into desired position and wrap excess portion of tights where the two hangers meet. I also bent the hook of the hangers inwards so they wouldn't snag on the wings.

5. Measure two pieces of elastic on whoever will be wearing the wings to ensure a proper fit around arms/shoulders.  
Cut two hearts from stiff felt, large enough to cover where the wings meet.  
Pin your elastic in place onto one piece of felt.  
Pin both pieces of felt together, sandwiching your wings.  
Try the wings on your subject to make sure the sizing is correct.
Hand sew each end of the elastic to one piece of felt. Make sure you reinforce those stitches to handle wear and tear.
With your wings in between, hot glue the two pieces of felt together.  
Smush it all together for a bit to adhere as much as possible.  
Repin the felt together, so the two pieces stays together while you hand sew it shut. Since I didn't want to risk sewing through the tights and creating a hole/run, hand sew all around the felt, but NOT through the wings/tights. If you need reinforcement for the felt to stick to the tights, apply fabric glue where necessary.

And that's it - let your little one flutter about for some Halloween candy!

To complete the DIY LadyBug girl costume, Mia's wearing black leggings, a red DIY satin trimmed tutu (or try a no sew tutu tutorial here), a red turtleneck and an antennae headband (60% off at Joann's). Not bad for an entire DIY costume under $10! For days, Mia asked if I was done making her costume and wanted to help sew *sigh* Love that feeling!

What are you or your little ones dressing up as this year?

linked up with Make It and Love It and:

 

Friday, October 19, 2012

DIY Draft Stopper Tutorial

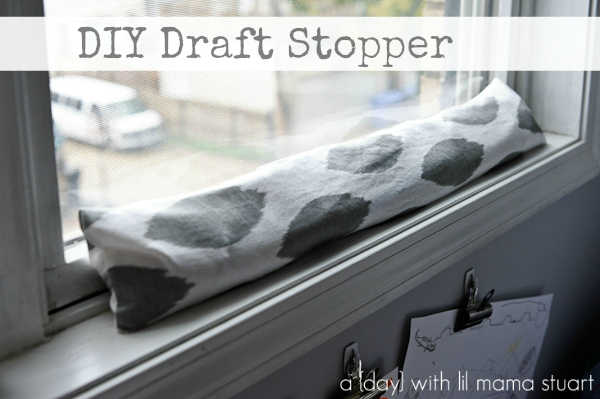
Happy Friday everyone! With cool, crisp Fall air among us, are you layered up trying to keep warm? When the temperature drops and the heat goes on, we start to feel a chilly draft come through our windows and fireplace. I used to roll up towels to keep the draft out, but now...I have a prettier solution for all of us!

Stop on over to How Does She where you'll find my step by step tutorial to make your own DIY draft stopper. If the rain holds off and I can take pictures of Mia this weekend, I'll have a DIY Halloween costume tutorial for you on Monday!

This weekend I'm attending our first wedding of the year, where I'm not the hired photographer! How about you?


linked up here:

Friday, October 12, 2012

Colorful Owl 1st Birthday Party: Decorations

I first photographed baby {Sophie} at 7 months old. A few weeks ago, Sophie celebrated her 1st birthday at the White Eagle Golf Club in Naperville. 
 
{Pillowcase dress from etsy shop MackenzieMadisons; shoes from Target}

I customized a party plan for Sophie’s mom, Alice, complete with tips and ideas to make a colorful and fun 1st birthday party come to life. Sophie means "wise" and since everyone associates owls with being wise,  Alice easily set the theme.
{DIY owl birthday invitation}

Guests were greeted with a beautiful entrance table using big tissue pom flowers and glitter letters spelling the celebrant's name.
{Printable banner from How to Nest for Less}

{Glitter letters from Hobby Lobby; putty on a wooden stick helped the letters stand}

The smash cake sat atop a beautiful cake stand from Hobby Lobby and was surrounded by more tissue poms on a slab of wood.  
{Owl Cupcake Topper from etsy shop CrumbyArt}


Upon arrival, guests were asked to leave a thumbprint on Sophie’s tree. The tree trunk was painted/stamped from the birthday girl's arm - how clever!
{Owl paper holders from JoAnns}

Inspired by the traditional Korean doljabi game, Alice had guests guess what Sophie would choose for her future.
{Plush owls from Pottery Barn Kids}

DIY Paper lantern owls sat atop every other table.
{Idea from mini miller}

And I love how Alice used water bottle labels as napkin rings instead.

After six months of planning, Alice spent a month putting together DIY details but I was most impressed with the sweets table where she made most of the goodies herself! 

The treats included chocolate covered pretzel rods, chocolate bird nests, candy dipped marshmallows, pink rice krispie treats, owl cupcakes and amazingly decorated owl cookies!
 
{Platter from Home Goods} 

Alice set out take out boxes for guests to pack up treats at the end of the party. Given that there wasn't a single crumb left, the sweets table was a success!

 Kids took home owl goodie bags full of random trinkets and treats.

Sophie did great with her smash cake...until everyone clapped and screamed with excitement and she got scared! Not surprisingly, this actually happens to nearly every child!


Thanks for having me Sophie! Your mama did a great job and I'm so happy the party turned out just like she envisioned! 

Tuesday, October 9, 2012

{Erin} - 18 Months

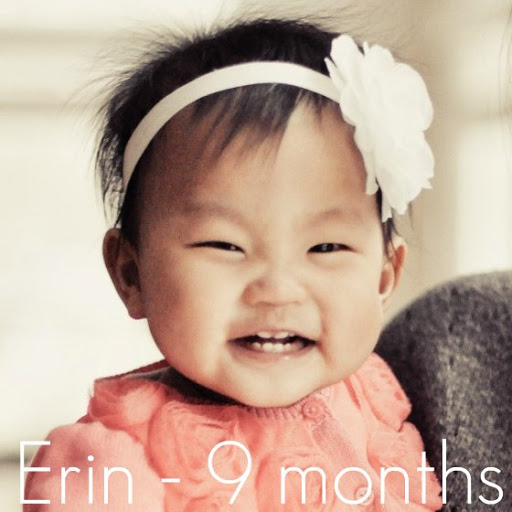
Last weekend, I gave you a peek at my 18 month old niece. I've been photographing baby {Erin} as she gets SO big since she was 2 weeks old...{click image to go to each post}
    

Can you believe this itty bitty thing went from this:
{2 weeks old}

To this:
{18 months old}

And this...
{3 months old}

To this...
{18 months old}

How sweet is she?

It was a gorgeous fall day so we headed outside...

...for a little walk...

...so Erin could show me around her neighborhood...

So glad we could spend the afternoon together sweetheart!

Friday, October 5, 2012

2 Years & 2 Sneak Peeks

Last weekend marked my two year blogging anniversary and I had the pleasure of spending it with these precious little faces!
Erin at her 18 month portrait session

Sophie at her 1st birthday party

Oddly enough, last October I said "Although I don't know where I'll be and what I'll be doing years from now, I know something good (aka creative) is in store for me." Little did I know that five months later, I was right! I was taken under the wing of Misha Media to photograph weddings on their associate team and I couldn't be more grateful to Rochelle {Happy 30th Birthday!} for introducing me to Michele and Andy four years ago.

On my blogiversary last year, I also quoted Pioneer Woman who said, "I'm nowhere near where I want to be. But I'm a lot closer than I'd be if I hadn't kept going." 

Another year has passed, and these two quotes still hold true. I am definitely not where I want to be yet and am having trouble finding my {business} identity. But if I keep chugging along trying to top what I did last...I'm one step closer to establishing that creative business of mine. I am extremely grateful for the life I'm able to live and to my friends and family who believe in me and provide the encouragement I need to push me in the right direction. Happy weekend everyone! ©

Thursday, October 4, 2012

Fondant Cake Decorating Class

Recently, my girlfriends and I took a fondant cake decorating class at Give Me Some Sugar. This small storefront is a cake decorating school in Chicago's neighborhood of Roscoe Village. A blank canvas of a cake or cupcakes are provided and you'll learn how to decorate the goodies to take home.

Not only was Chef Alekka accommodating with our difficult schedules, but the class was BYOB - always a plus in our books! Give Me Some Sugar offers a variety of classes, private events (birthdays, bachelorette parties, etc), and special events (Cupcake & Cocktails - included in the class price are cupcakes/cakes to decorate and take home in addition to drinks and recipes from a mixologist!).

In our two hour private class of three students, Chef Alekka demonstrated how to level and frost our cakes and covered all the little tips and tricks to working with fondant from rolling, dying, covering, shaping, to storing the leftovers. As with everything, you could probably figure out the basics with an internet search. But Chef Alekka filled us in on little tid bits of information here and there that I wouldn't get from a generic online tutorial. After learning the basics from Alekka, I'd definitely try making fondant cupcake or cake toppers for my future parties.

I was surprisingly impressed with Agatha's {the least domestic of us 3} cake decorating skills from leveling, frosting, laying and sculpting the fondant!

Overall, it was a fun Tuesday evening with my girlfriends, polishing off two bottles of wine, learning the basics of working with fondant and taking home three personalized cakes to show for it.


Mia definitely liked the cake I brought her and posed as if she baked it in her little kitchen set :)