Photobucket Photobucket Photobucket Photobucket Photobucket Photobucket

Monday, October 31, 2011

Trick or Treat!

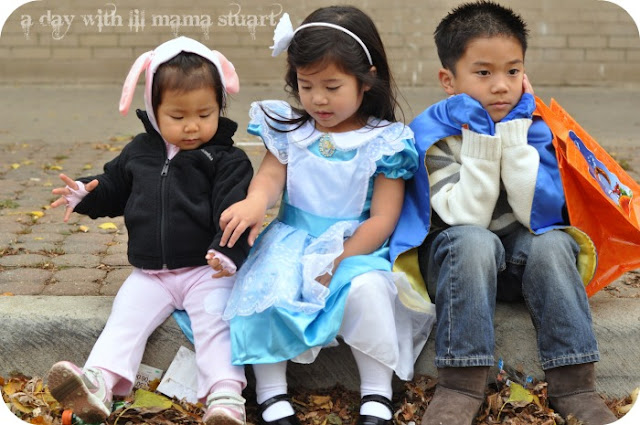
For the first time in four years, I missed my friend’s pumpkin carving party. But, with the bigggggg punnnnnnnnkin that we picked up from Goebbert’s, we carved this spider up (idea from here). My dad called it a crab though L Check out this post to see what we carved up the last four years and how Maya went from Tigger to Eyeore and now her little sister is Tigger J And I guess Mia could pass for Piglet instead of a puppy L
Sunday, we took the kids to a neighborhood parade. I hope the kids had more fun than Ryu makes it seem! 
Monday, we took Mia trick or treating with our neighbors and my babies loved it! The kids surprisingly made it up and down five blocks in an hour, mostly on their own. It felt very safe and welcoming with everyone in the neighborhood sitting at the bottom of their steps to greet the kids. Which is helpful when you have tiny legs and lots of steep steps....
And I liked peering inside their big houses like a creeper haha. Hope you had a Happy Halloween!
I'll be digging through Mia's stash muhahaha.

Sunday, October 30, 2011

DIY Puppy Dog Costume

Just like last year, I made Mia a simple Halloween costume consisting of ears and a tail. Thanks to Uncle Jeff giving Mia a new stuffed animal upon every visit, Mia loves puppy dogs, especially Daisy. So with a pink hoodie, pink sweatpants, pink socks, and pink and white felt, Mia is going to arf! arf! arf! all weekend long just like her best friend Daisy. Here’s how you can make a last minute an easy (no sewing machine) DIY animal costume for your child too...and it cost LESS THAN A DOLLA! HOLLA!
Time: 3 or 4 DVR'ed shows (a few hours because I'm lazy to get the sewing machine out and am a slow hand sewer)
Materials/Cost:
Hoodie, pants, socks (all same color)
Felt (pink for ears and tail, white for spots) - $0.33 a piece I think?
Needle & thread
Total Cost: Less than $1!
Instructions
1. Draw shape of ears and tail on paper. Cut paper out. Fold felt in half. Use paper pattern as a guide to cut your felt. You should have 2 of each piece. Because I didn't follow my own instructions and just went straight to cutting my felt, my puppy dog ears look like bunny or pig ears L
2. Hand sew 2 pieces together leaving an opening to turn inside out (so seams end up on the inside).
3. Hand sew ears to hoodie and tail to pants.
4. Cut spots and sew wherever you'd like them.
5. Cut 5 slits in each pair of socks to make holes for fingers. Cut felt and sew paws onto socks.

Arf arf arf! She looks like a dog and not a bunny or pig, right? L Check back on Monday to see more pictures of my little puppy on Halloween!

I also got my friend ready to party it up tonight in a $1 Pirate costume (black tank top, black shorts, black tights, $1 eye patch, red and white striped fabric). Cheap and cute projects make me giddy. Thanks for letting me play dress up!

linked up here:

Saturday, October 29, 2011

DIY Halloween Monster Decorations

Originally I wasn’t going to decorate for Halloween. Which is such a slacker mom thing of me to do considering I loved decorating the house for Halloween as a kid. Now that my nephew and niece are joining us for the neighborhood Halloween parade tomorrow, I figured I should dress our place up to be more festive. Since it’s last minute and I don’t want to buy anything, I used leftovers from the Monster and MonSTAR parties to get some Halloween cheer going. Everything was done during nap time with materials I had on hand. When Mia woke up she said "Monsters everywhere!" Doug on the other hand said "There's a birthday party at my house." hmph, decorations make me happy J
Vase wrapped with yarn and googly eyes glued on to hold candy.
Mia's punnnnnnnkinnnsssssss J
Backgrounds for frames made with Sprik patterns and picnik.com (both FREE!)
Monster made with a wreath form, yarn pom monsters, leg warmers, Kira’s shoes, pipe cleaners (antennae) and chopsticks (arms). Mia says “Hi monster” just about everyday J Styrofoam cones wrapped with yarn and googly eyes glued on.
Grocery store flowers.

Happy Halloween banner made with Sprik patterns and picnik.com, glued to black ric rac.  

I hope the kids like it!

linked up here:

Thursday, October 27, 2011

Goebbert’s Farm - Chicago Area Pumpkin Patch

Last year, we decided that Goebbert’s Farm in South Barrington would be part of our Halloween tradition. We definitely like Goebbert’s (up north, FREE admission) better than Bengston’s (down south, $12/pp admission - that adds up for a family fast!). You can pay to see animals or to ride rides at Goebbert’s, but we have a good time without those activities!

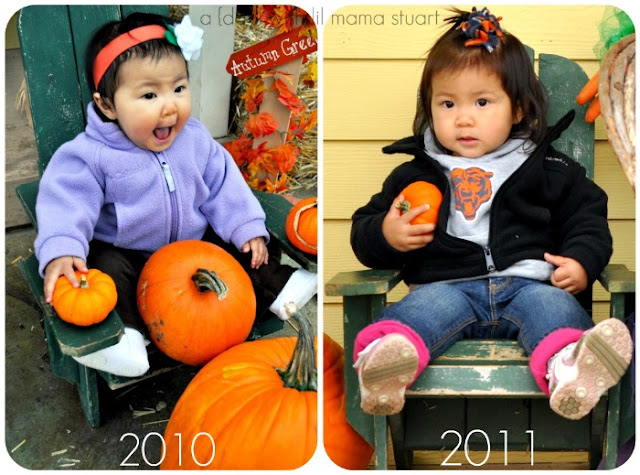
Like last year, it was rainy in the morning, but beautiful in the afternoon! Yes, on Sunday's in the fall, Mia only wears Bears gear haha.  We went a few weeks ago, and Mia is still talking about “Pumpkins everywhere. Mia picked one. Heavy. Mia strong. Daddy picked one. See camel. Ride slide. Weeee! Drive fire truck. See Pooh. Have fun pumpkins...” And Doug told me numerous times with a big happy I-love-my-family-SO-much smile that he loves our family tradition of picking out pumpkins...
...driving the fire trucks and trains, walkin' around...
...riding the slide, taking pictures with all the cutouts...
 ...and eating corn on the cob and apple glazed and cinnamon sugar donuts...

We definitely recommend!
And I couldn't help myself...Ready for another same time last year comparison??
With Halloween festivities in a few days, I better get crackin’ on making Mia’s costume, eek!

Tuesday, October 25, 2011

Fall Colors at the Morton Arboretum

The weather has been unseasonably warm this October and I sweat my butt off enjoyed a Saturday morning at the Morton Arboretum with a family of four. Samantha’s favorite season is fall, so the Arboretum was perfect for a family photo session amidst the colorful leaves.
Charlie (2.5 years old) loved exploring the leaves, sticks, water and trails while Jack (9 months) calmly took in the fresh air.
Good eye for setting this one up Samantha!
 
It was fun exploring the beautiful grounds!
Congrats on the marathon Jim and Happy Birthday Samantha!

**Don’t see any family pictures in my posts? I don’t want to spoil their Christmas/Holiday card!**

Tuesday, October 18, 2011

{Noah} – 6 months

A few weeks before their family photo session, Christine told me she bought the boys new Bears shirts. She wanted to get a picture of Elijah (2.5) and Noah (6 months) in their new gear, but Elijah said something along the lines of “No mommy. Mindy takes our pictures.” When Christine told me what Elijah said and that I was now the designated family photographer, it warmed my heart!

Elijah really is super excited whenever I come over which makes photographing his big happy smile so much easier. The key to Elijah welcoming me with big hugs and grins (other than my charming personality - ha kidding) is how Christine repeatedly talks about the upcoming photo session beforehand. Check out her post on how to prepare a toddler for a photo session. Although, as most parents know, big smiles can unexpectedly turn to pouty faces within a few minutes! 
It was so much fun shooting outdoors and at a park! Elijah's got the choke hold bear hug down. J
 Ok, back to the reason why we do these quarterly photo sessions...Baby Noah!
Love his big gummy drooly smile!
I think he gets that big beautiful smile from his mommy J
Dontcha just wanna rub his soft sweet face? And gotta love chubby baby hands!
  Thanks for another fun afternoon guys!

Thursday, October 13, 2011

DIY Photo Booth Sign

Party crafting (and super late nights) for the MonSTAR first birthday party are in full effect people! Last night, I whipped up a sign for the mini photo booth we'll be having at the party this Saturday.
Super easy. Here's a basic tutorial for designing your own photo booth sign with Picnik.com (free!).
1. Download a FREE background from Sprik Space. Her patterns and colors are so versatile! Upload to Picnik.com
2. Crop to 8x10 (or whatever size you want).
3. Add a shape ("sticker") - I used a black oval.
4. Add text - I used three different fonts and colors.
5. Add more stickers - I used a star, smiley face star and a monster in different colors.
Done! This concept can totally be used to make treat bag toppers, cupcake toppers, food labels, and other party printables!

After too many 2am nights this week, I'm going to bed at nine tonight!


linked up here:

Tuesday, October 11, 2011

Fall Barn Wedding

This past weekend, we attended our last wedding of the year. With warm temperatures and abundant sunshine, Kyle and Christina couldn’t have asked for a more beautiful day for their outdoor ceremony at the Byron Colby Barn in Grays Lake. A close friend officiated the wedding which set a casual and ever so meaningful tone to the ceremony. The couple vowed to walk hand in hand, side by side and heart to heart with one another ♥

How freaking adorable are the flower girls in cream colored ruffle dresses and fabric flower headbands atop their loose curls?! And the ring bearer in those suspenders! Oh my cuteness...

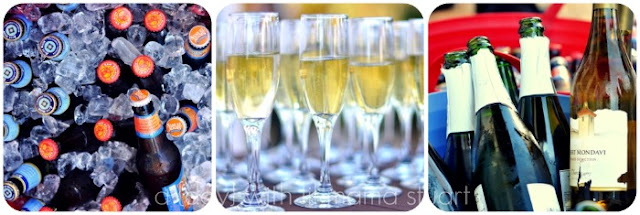
I love a refreshing drink outside. While taking in the warm evening sun and colorful fall foliage? Yes please!

Christina is artsy fartsy like me, so when I received their invitation, I knew right away that there’d be lots of DIY details to feast my eyes upon…which means lots of pictures for you J Invitations really do set the tone for an event.

A chalkboard seating chart and menu for the buffet style BBQ dinner (yum!) greeted guests.
Assorted pies for dessert? Lovely! 

 Mason jar flower arrangements, burlap runners and pumpkin table numbers for a fall tablescape...  

I love the new trend of fingerprint “guest books.” Great for baby showers too! 

The bar was located in the silo (how cool!) and Strongbow was on the drink list. Ahhh, brings me back to my drunken summer travels in Europe. The bouquets and caramel apples for favors even had burlap!

As you can tell, every. little. thing. from the burlap wrapped monograms to her gorgeous lace dress with a cutout back and her soft floral hair piece went together so beautifully.  Scattered votive candles and strung lights cast a warm glow in the barn to further create a romantic, cozy fall wedding.

Christina you did an amazing job (all by yourself!) with all the details. I know you’re glad it’s over, but it really did pay off J Congrats you two!