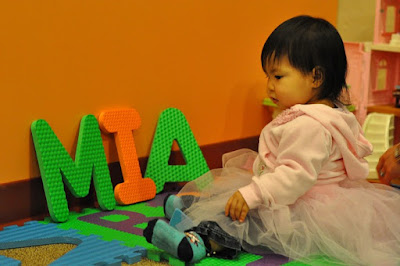
Last summer while strolling through the city’s many festivals, I saw adorable baby tag blankets. Of course I touched them to admire the softness, looked at the price tag, and put it right back thinking I can so make that. Which made me feel bad that I’m not supporting other crafters. But why buy if I can do it myself! So nearly a year later, I crossed this project off my list.
Not gonna lie, this project took me three hours after bedtime. It would help if I had my sewing machine parts on correctly and didn’t have to waste 30 minutes on threading the bobbin properly. It also was my first time attempting an appliqué (using Heat’n Bond and an appliqué stitch on the sewing machine). I originally was going to make a blankie just like all the other ones out there. But when I was done sewing, it was calling to me saying it would be the perfect addition to Mia’s other pillows. Here’s the breakdown…
Materials/Cost
2 types of fabric - $5-10
♥ get something soft for the baby, like minky/dimple dot fabric (use your 50% off coupon!) for one side and some other soft coordinating fabric for the other
♥ I bought a yard of the minky - which is waaaaaay too much. I could probably make 10 of these pillows/blankie with that much fabric
Scraps of coordinating ribbon - $4 if you don't have any on hand
Optional – appliqué: Heat’n Bond Lite (fusible web found at the cutting table)
- $2
If making a pillow – stuffing/pillow form
♥ I decided at midnight that this blankie will now be a pillow and didn’t have stuffing or a pillow form. So I scoured my fabric box for scraps and found a ton of ugly colored fleece = free! J
*Keep in mind the prices above reflect my actual purchase, and not necessarily how much for the one pillow/blankie. I’ll have a TON of leftovers for other future projects I haven’t dreamed up yet.
Time: 3 hours – I’m being honest here. It shouldn’t take you this long, but I was kind of winging it, like most of my one off random projects.
Instructions:
- Wash fabric. Do it right when you get home from the craft store. So when you have the urge to craft at 10pm like I did, you’re ready to go.
- Cut desired pillow/blankie size + 1 inch out of each piece of fabric. My pieces were 12x12 for an 11x11 pillow/blankie.
Optional – appliqué (If not doing this, skip to step 9)
- Cut a square of fabric large enough for your desired appliqué (could be an initial, an animal, whatever you want). Mine was probably 5x5 for the letter “m” on my 11x11 pillow/blankie. My appliqué fabric was the same fabric as the backside of my pillow/blankie.
- Cut the same size of your Heat’n Bond. Follow instructions that came with your fusible web to attach the two together.
- Draw your shape on a piece of paper and cut it out. I free handed my “m”.
- Put your cut out shape face down on the Heat’n Bond (because the Heat'n Bond will be the backside of your shape) and trace . Discard paper. Cut your shape out of your fabric. Turn it over and your fabric side should correctly show your shape.
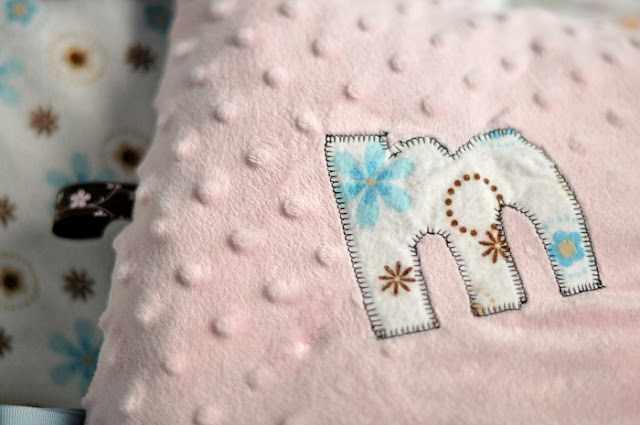
- Follow instructions that came with your fusible web to adhere shape to pillow/blankie. Since this was my first time, I could use any tips you have. My letter “m” didn’t adhere that well to the minky fabric, but I didn’t mind since I knew I’d be stitching it on later. *TIP* I unintentionally ironed out some minky dimple dots when trying to adhere my appliqué L Try and avoid doing that.
- Look in your sewing machine manual for an appliqué stitch. Stitch all around. My rounded edges aren’t perfect, but whatevs.
Back to the pillow/blankie…
- Then I roughly followed this tutorial. There’s a ton out there if you Google it. I don’t like too many tags so I just placed three ribbons on each side in varying patterns, widths and textures. I probably should’ve reinforced my seams, since Mia may be tugging at the ribbons a lot. But I need instant gratification and moved on with the project.
- After I flipped my piece right side out, it screamed “I should be a pillow with the others in Mia’s reading nook!” That’s when I went looking for something to stuff it with and found scraps of ugly fleece. After stuffing, I used this ladder stitch tutorial to sew that baby shut.
Ta da! 3 hours and 10 steps later (ha!), a super cute DIY baby tag pillow for Mia J Then it was time for bed. At 1am. I think the second time, it should go quicker. I hope. I plan to make baby tag blocks too…just add that to my always growing never remembering what’s on it because there’s too many fun ideas project list.
linked up here:

 Hehe we were being silly during family time the other night J We always think its funny to see Mia’s big Korean head squished inside her hoodies. And perhaps she’s outgrown this outfit considering it’s bunching up at the knees haha. But it’s sad how quickly she outgrows cute outfits and I hold out as long as possible before putting them away. L


